

Last year I ran a sixteen article series on Making Mine Scenery, but it revolved around fully modeled 8"x10" board sections. This idea pre-dated my decision to switch to 8"x8" board game tiles, similar to games like Zombicide. These newer game tiles were still based on my original designs, but going square just made them more flexible to use and easier to design. However, that isn't the only drive behind revisiting Making Mine Scenery.
 |
| A more recent incarnation of the board game tiles with their 3D equivalents. |
In the last year, roll out game mats have taken the wargaming world by storm. Yeah, they started to make an impact a few years ago, but now they are everywhere and they are incredibly varied. A lot of the early ones didn't make me go, "WOW!" But Guerrilla Miniature Games Widgets and Wonders series on Youtube and their weekly programming of battle reports using these mats has showed me it was time to present another way of creating BC scenery to accommodate the game mat crowd. The GMG 'Widgets and Wonders' video linked above shows a 3'x3' wasteland mat that looks like it would be perfect to combine with the blocks I'm about to show you how to build.
 |
| 2"x2" strips of pink foam. |
I started with my usual pink foam. I used 2" thick foam and cut it on a table saw into 2" wide strips. Now I know most people don't have access to a table saw, and honestly, the occasional kickback it occasionally delivered when it bit into the foam was sort of terrifying. You can use a break away blade knife or a foam cutter if you prefer.
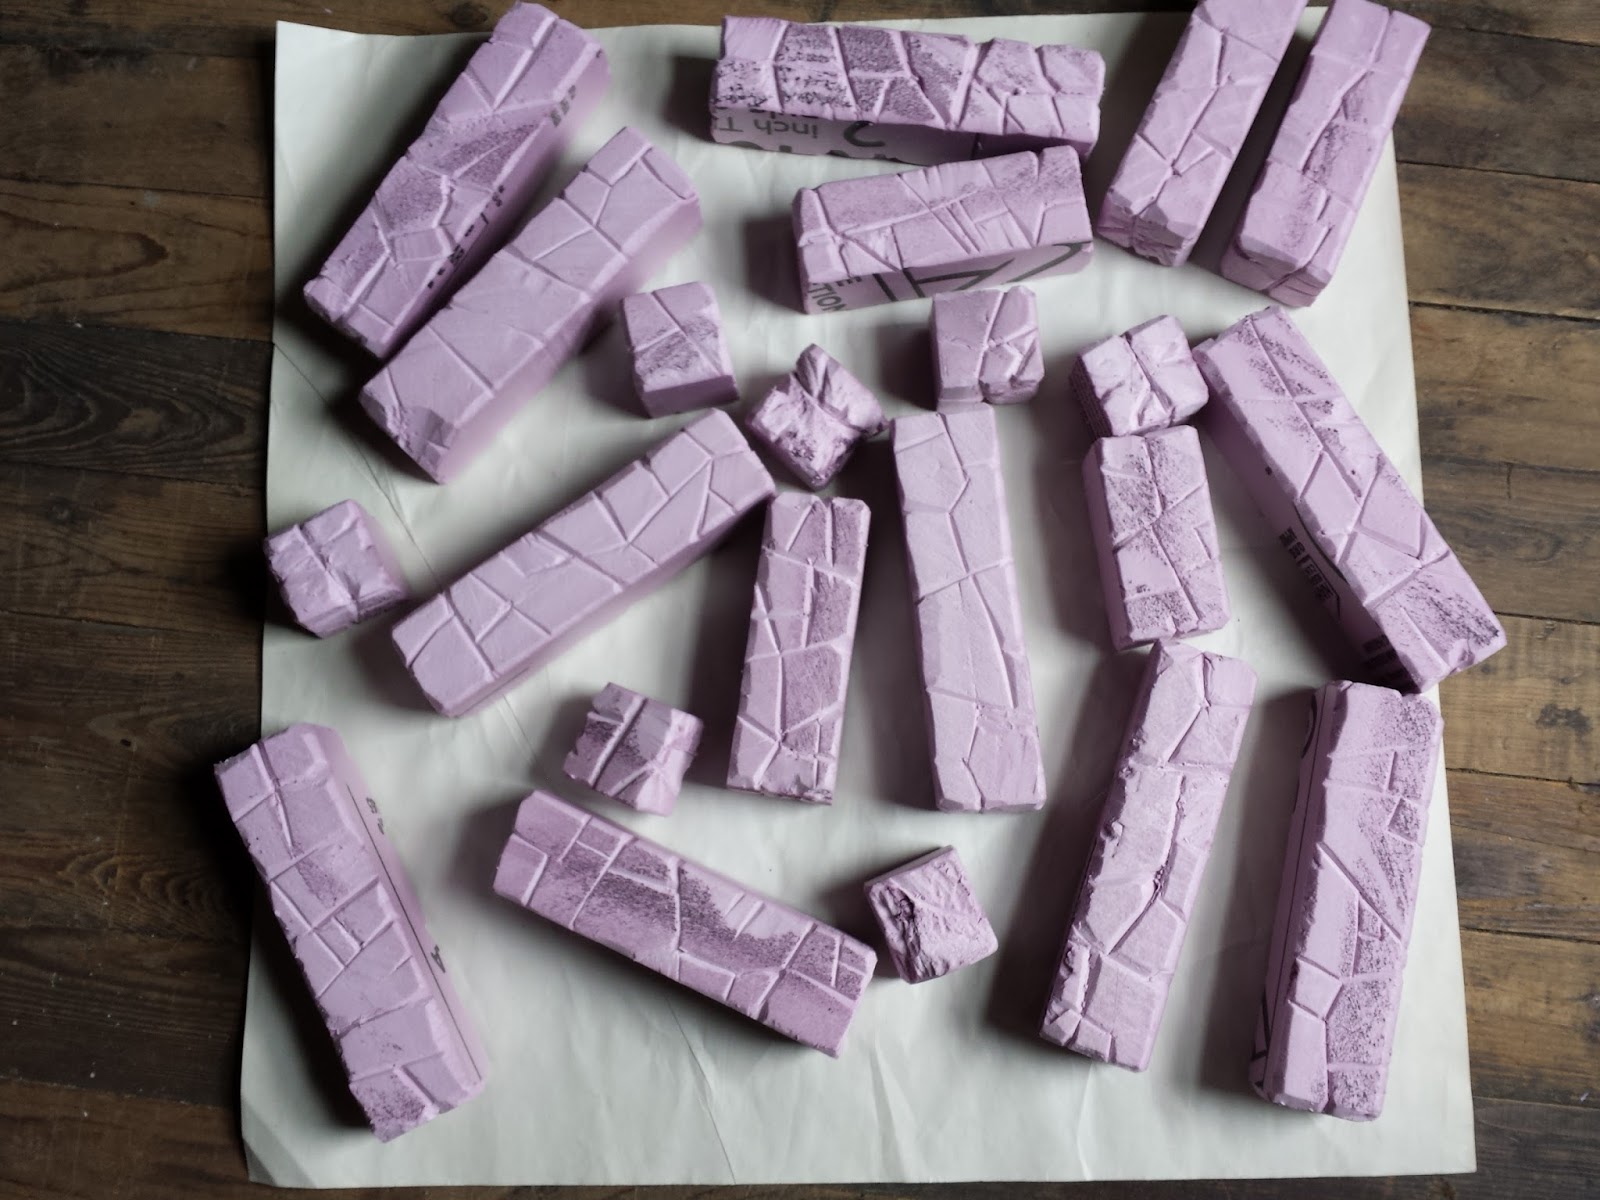 |
| Foam blocks cut to different lengths and textured with "V" cuts. |
 |
| First coat: Citadel Rhinox Hide. |
Once the batch of cut blocks were done and read for painting, they were given a coat of Citadel Rhinox Hide/Citadel Scorched Brown. This was actually matched at Home Depot in their paint sample sized container for a few dollars.
 |
| Second coat: Citadel Rhinox Hide (again). |
Next they were given a second coat to ensure maximum opacity. Off to the right hand side, out of view, was a box fan drying the paint quicker so I can move stages along.
 |
| Third coat: Zamesi Desert drybrush. |
The next stage was a very heavy drybrush of Citadel Zamesi Desert/Citadel Bubonic Brown. I drybrushed largely in one direction all the way around, then flipped the block over and went in the reverse direction. If you wanted the light to come from a specific direction you could change that up and just do downward strokes or whatever.
 |
| Fourth coat: Citadel Ushabti Bone drybrush. |
Next I followed with a drybrush of Citadel Ushabti Bone/Citadel Bleached Bone. This was done more lightly to allow some of the Zamesi Desert to still be visible.
 |
| Fifth coat: Stippled Apple Barrel Graphite. |
These are supposed to be iron mines, so to give them some of that character and tone I started targeting areas with other colors. This stage was done with a jabbed stipple of Apple Barrel Graphite, but could be easily replaced with Citadel Mechanicus Standard Grey. I tried to stick to recesses and other areas to draw out interest.
 |
| Sixth coat: Stippled and drybrushed Citadel Ironbreaker. |
The Graphite areas were stippled/drybrushed with Citadel Ironbreaker/Citadel Chainmail.
 |
| Seventh coat: Stippled and drybrushed Citadel Ryza Rust. |
To finish it out, I did a liberal drybrush and stipple of Citadel Ryza Rust, though any orange would do.
 |
| Close up of the colors. |
As you can see there is a whole lot of color on the finished blocks.

I don't actually own any game mats so I set up some shots using one of my finished flat desert boards.

And I threw in some bits like this Wreck-Age shipping container for good measure.
 |
| 24"x24" board made out of these blocks and a some prefab terrain. |
This 24"x24" area was set up using entirely the set of blocks that I batch painted throughout those pictures. I'm still a little short of what would make what I would see as a perfect set capable of making a hugely flexible board. To do that I need to cut a lot more of the 2"x2" cubes and get them painted up.
 |
| Two level set up. |
As I was playing around with the blocks, I also saw the creative options combining these with game board tiles could provide. This is actually a two level board built out of blocks and game board tiles.

You can see it from a model's eye view here. I think this could make for some fantastic gaming options!
Thanks for reading.
-Nick
PS. If you want to check out the original series to see more things you can do with your mine scenery, here are the links:
Making Mine Scenery Part I - Project Overview
Making Mine Scenery Part II - Making a Chasm and How to Do "V" Cuts in the Foam
Making Mine Scenery Part III - Colors Compared to a Real Iron Mine
Making Mine Scenery Part IV - Chasm Continued and Secret Tunnel
Making Mine Scenery Part V - Building and Painting the Secret Tunnel Seal
Making Mine Scenery Part VI - Secret Tunnel/Chasm Complete and Hydraulic Door Begins
Making Mine Scenery Part VII - Scratch Built Hydraulic Door
Making Mine Scenery Part VIII - Painting the Hydraulic Door and Caution Stripes
Making Mine Scenery Part IX - Making Rock Piles and Cave Ins
Making Mine Scenery Part X - Building an Elevator Shaft
Making Mine Scenery Part XI - Scratch Building and Painting an Elevator Cab
Making Mine Scenery Part XII - Detailing and Painting the Elevator Area
Making Mine Scenery Part XIII - Feature on Playtester, RobH's Mine
Making Mine Scenery Part XIV - Building and Painting Fencing from Horizon 3DMaking Mine Scenery Part XII - Detailing and Painting the Elevator Area
Making Mine Scenery Part XIII - Feature on Playtester, RobH's Mine
Making Mine Scenery Part XV - Horizon 3D Detailing Continued
Making Mine Scenery Part XVI - Building the Cavern from 'It's Time'
This comment has been removed by a blog administrator.
ReplyDeleteThank you for all of these fantastic resources.
ReplyDelete