
 |
| Model's eye view of the panels I created to seal this opening. |
In Part V of the series we're going to focus a bit more on the details that will add atmosphere to these pink foam and play sand creations. I'm going to start with the piece I scratch built to seal off the "secret tunnel" I built into one of the board sections. In Making Mine Scenery Part IV I went through the step-by-step process of building the panels. Here is where I left off:
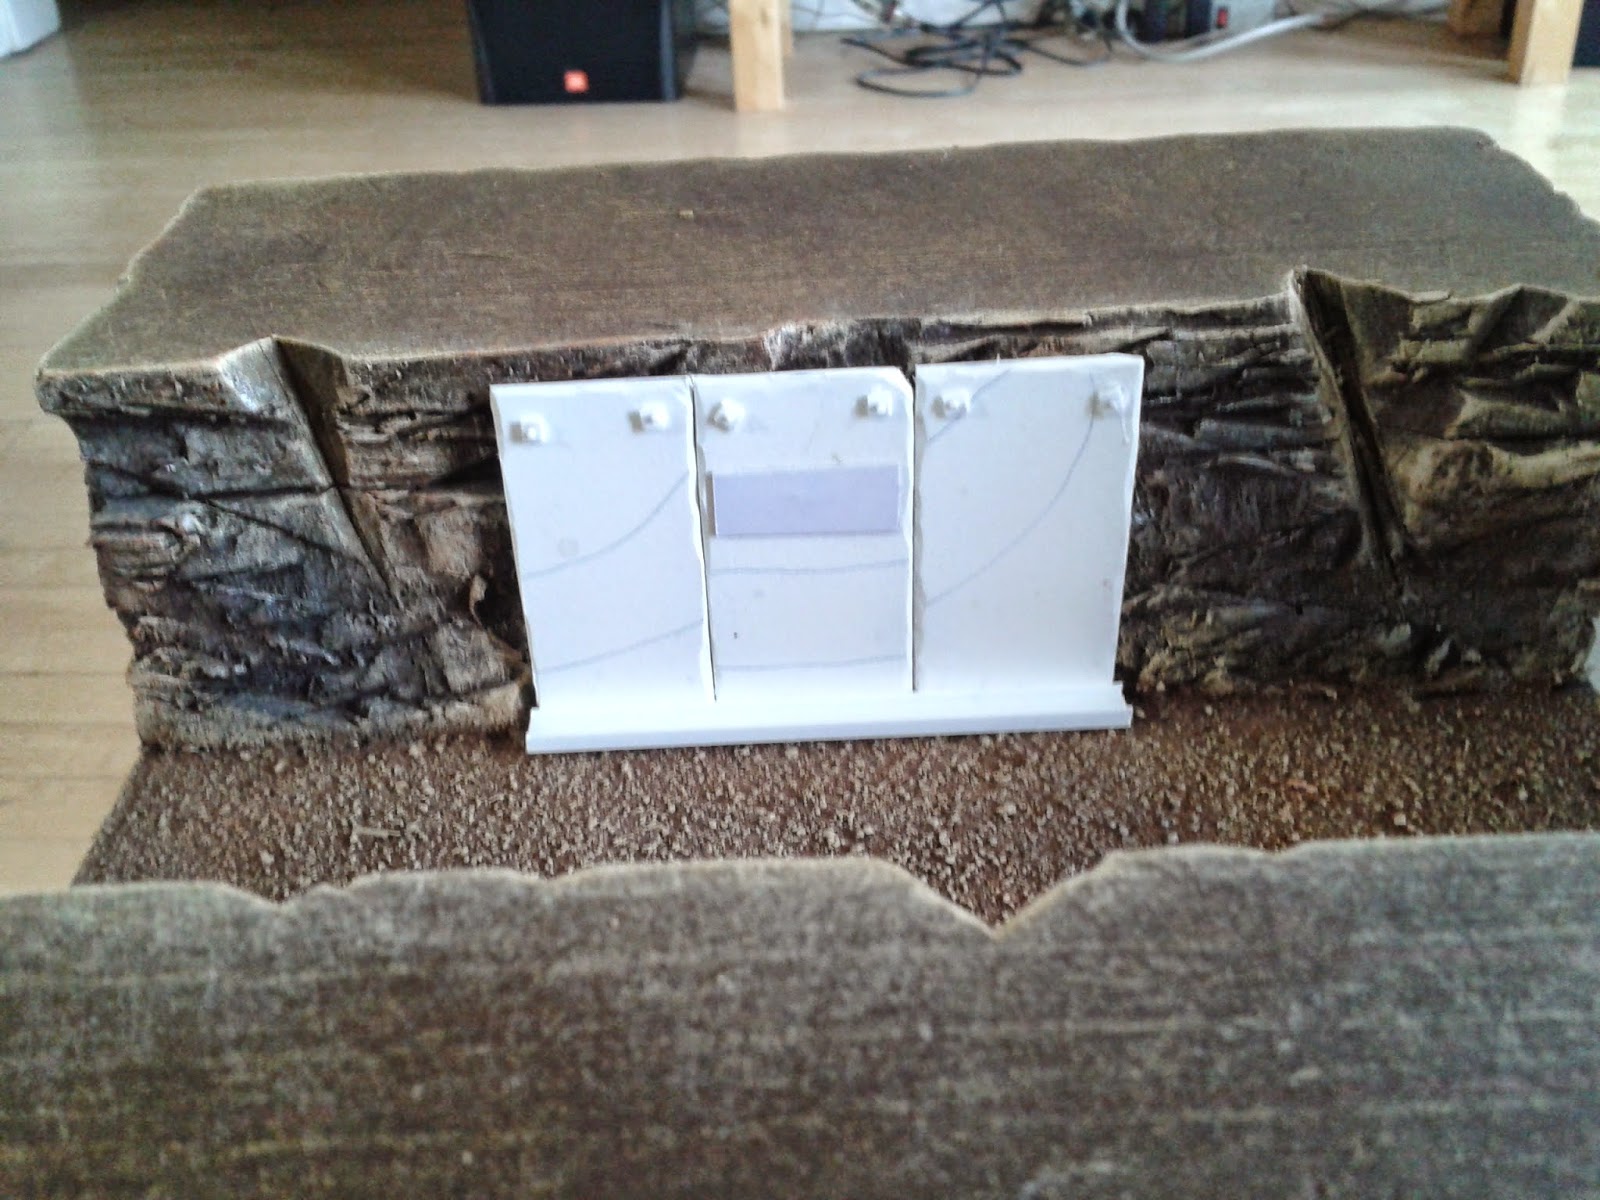 |
| The three panel "seal" scratch built in Part IV. |
 |
| Drybrushing Tin Bitz. Tell me what brand of paper towels I use from the photo and win my praise! |
I primed the panel piece with Chaos Black Spray and then gave it a heavy drybrush of Citadel Tin Bitz.
 |
| The blister pack in the corner was a free model I got at AdeptiCon 2014. What do you think it is? |
I'm skipping steps here, but next I drybrushed over the Tin Bitz with Citadel Boltgun Metal (Lead Belcher I think its called now) and then again with Citadel Chainmail. With each level of drybrush I went lighter and lighter, focusing more on the edges and rivets. Then, I took a Fine Detail Brush and highlighted the top, right, and left edges like light is coming from the top down. I also used the Fine Detail Brush to add a few scratches. You can see one on the far right panel about the height of the sign, one near the bottom of the middle panel, and 3 or 4 short scratches on the far left panel.These help convey a more rugged appearance.
 |
| 2000's Citadel paints didn't have the opacity so that sign took 5 coats. |
I then wanted the sign to have a background that was chipped and worn, so I used several thinned down layers of Citadel Bleached Bone in a splotchy pattern to create that effect. Bleached Bone doesn't have the opacity to cover it in a single coat, so it took more like five!
 |
| Adding the Kommando Khaki outline helps give it the chipped paint feel. |
I wanted the edges to look more chipped, so I outlined my Bleached Bone with Citadel Kommando Khaki and then went back and cleaned it up with more Bleached Bone where my outline was too heavy/thick.
 |
| I'm not ready for a life of lettering comic books. Definitely not. |
Since this is terrain, I didn't want to spend forever on lettering so this isn't exactly my best lettering work. But first I took a mechanical pencil and wrote "RESTRICTED" on a piece of paper at a size that felt right for my signage. I wanted to be certain that it would center properly and not go off the end. When I felt good about my letter size and spacing I lightly wrote with pencil right on the sign. Then I thinned down Chaos Black, rolled my tip of my Fine Detail Brush through the thinned paint, and then rolled it again lightly on a napkin to draw of the excess, giving me a sharp tip with a controllable amount of paint that I could write with. Its a slow process, but I traced my pencil letters and gave them each two passes to make the letters opaque. A little frustrated with R's, S's, and C's, I chose to throw some random letters and numbers on the left panel that were all straight lines. These were done with an initial pass of Bleached Bone, and then 2-3 passes of Skull White. Feeling like I spent too much time already on lettering, I moved on knowing I'd be weathering over it anyway.
 |
| Ryza Rust went on surprisingly dark over the metal, so Fiery Orange had to be added. |
The reference image I used to inspire these had the bolts at the top being bright orange with rust. I stippled (like drybrushing, but using a jabbing motion instead) Citadel Ryza Rust onto my bolts. Feeling they came out too brownish, I did it again with Citadel Fiery Orange.
I want to take a moment to point out the value of highlighting the edges of those bolts/rivets with Chainmail. You might think it wasn't worth the effort because I covered over it with orange, but the areas where the Ryza Rust shows up the brightest are the areas where they were highlighted.
 |
| This is actually not how weathering powders are traditionally used. |
When looking at the reference photo from Part IV, the metal pictured is way more brown, rusted, and dirty than my sections, so I grabbed a beat up brush, put the tip in my Forge World Aged Rust Weathering Powder, and jabbed the brush into the bottom left corner of the far left panel. This caused most of the powder on the tip of the brush to fall off around that area so then I jabbed repeatedly at the powder that fell off, working along the bottom, and then further up. Like drybrushing, the weathering powder stays in the bristles and can be worked as much as you like, spreading it around and creating lighter and darker patches.
 |
| By request I added another stage. |
Update: I posted this article up on Sunday and shared it on a bunch of Facebook Groups, and F. Crowley on Miniature Painting and Terrain Building wanted to see even more rust and weathering, so I added another stage. In the above photo I took Citadel Macharius Solar Orange and watered it down a ton to turn it into a wash. I used the brush to spread the wash around the bolts and then pulled down with the tip and pulled away as I went to make drips that thin out at the tip. When that dried I took Citadel Devlan Mud and washed that into the recesses around the nuts and bolts. While I had Devlan Mud out, I also washed it into the separations between panels to make them more defined, and did the same where the panels meet the girder at the bottom. Its a subtle addition but it adds even more character.
I still might go back to this piece again, but for now it is done and adds a bit of atmosphere to the mines while serving the practical purpose of hiding that "secret tunnel". In the next part we'll go back to the chasm piece and possibly explore some new ground? We'll see. If you missed the earlier articles in the series, here they are:
Making Mine Scenery Part I
Making Mine Scenery Part II
Making Mine Scenery Part III
Making Mine Scenery Part IV
Keep reading and keep building folks! Follow Broken Contract on Facebook and Twitter for the latest updates and teasers. Expect hobby articles to drop on Sundays and Wednesdays going forward, and expect a new Kickstarter for the game and models to be announced soon. Thanks!
-Nick
Nick,
ReplyDeleteLooks really good. Thanks for showing the pre primer stages too. I always love seeing how something goes from the beginning stages to a final product, really helps remind us what is possible in this hobby! Weathering is great!
Thanks so much Greg! And I really appreciate you taking the time to comment. Thank you.
ReplyDelete